

How was your week fellow artists? Did you sketch anything? I’ve been hard at work trying different ways to make paper daffodils…making templates, an outline, photos, videos….more videos….and did I mention mistakes? Well hopefully with today’s lesson, you’ll be making flowers, instead of mistakes.
First things first, your shopping list:
- scissors
- wire cutters

- floral wire, preferably fabric or paper wrapped wire stems, found at Hobby Lobby or Michaels in the floral section. Mine is 18 gauge.
- green floral tape, also at Hobby Lobby or Michaels
- straws (optional, but will give you more realistic looking bulbs. I tried both plastic straws with flexible tips and some thinner paper straws I found on clearance at Hobby Lobby.)
- stamens, yellow or orange. These can found at Hobby Lobby or Michaels in the cake decorating section.
- cotton balls (also optional, but I like to wrap cotton around the base of the flower to make it wider)
- crepe paper (a darker color for the inside petal and lighter color for the outside petals): You can do white with orange center, white with yellow center, yellow with orange center, or all yellow. I like the stiffness of a heavier crepe paper for the center petal and a thinner, more flexible crepe for the outside petals. I order most of my crepe paper from Castle in the Air or Papermart.com. For the outside petals, this time I went cheap and easy with streamer crepe from Hobby Lobby. You can do the inside petal in this thinner crepe as well if you want a more delicate wispy look (or if you’re antsy and ready to start right away….instant gratification!)
- if using straws to make the stem thicker, you’ll want a hot glue gun or craft glue to set in place.
- a ruler to measure your crepe for cutting
Steps:
- Print the petal templates I created just for this project (boy was this a huge learning curve for me….I definitely have a lot of digital know-how to learn): Templates, daffodil [23402] These are the outside petals.
- You will need 3 of each size cut from the thinner crepe. I like to fold the crepe into three sections and cut each size petal all at once like so:


- Ok, so now for the center petal. Cut a section from your stiffer crepe that is 3″ wide by 2″ deep. As you can see by the larger orange crepe (above), you want your shorter side with the grain of the paper.
- The stamen will consist of 3 to 4 yellow or orange cake decorating stamens. Or you can make your own stamen with a 1″ wide by 1.5 ” piece of crepe, cut with the grain on the long side and fringed with scissors. To fringe, simply make several cuts down the length of the crepe (with the grain) about 3/4 of the way down, like so:


- Now cut ‘waves’ on one long side your center petal crepe (as demonstrated in the third photo above).
- Now lay out all your petals, stamens, a wire stem, and several cut sections of floral tape. These are what you will use to wrap each part of the flower to the wire stem. It is best to cut them ahead of time before you forget….and then all of a sudden you have a handful of petals perfectly placed and no tape….no this has never once happened to me…this is all hypothetical of course ;).
- Now limber up those fingers because this is where the fun really begins! You will first be attaching the stamen. If you fringed your own stamen, crinkle the base of the crepe as you wrap it around the stem. If you bought cake decorating stamens, simply fold them in half, so the round tips are all together and hold tight against the end of the wire stem. To attach the stamen, press one end of a smaller section of tape to the base of the stamen and wrap the tape around and down the length of the wire stem, stretching slightly as you go to activate the adhesive. For those of you visual learners, the video below demonstrates wire wrapping technique as well as most of the flower steps.
- The cotton ball step is optional but if you want a wider flower base, pull off a small section of a cotton ball and wrap around the base of the flower. Secure it with tape.
- Now, grab your center petal piece and stretch each round to give a flutterly feel to the petal. Crinkle the straight base as you circle it once around the stem, overlapping just a little at the end. Secure by wrapping with tape. Shape the base of the petal by stretching it slightly all the way around to make it look more round rather than crinkled.
- Now, let’s move on the outside petals. First stretch the middle of each petal gently so that it bends slightly backwards. Scrunch the base of each petal. Now attach each petal so that they bend away from the center petal with floral tape, alternating the 2 styles. You can place each petal where you want them and hold them all tightly while wrapping or you can cut a really long piece of tape and attach each petal individually while wrapping. I almost always drop a petal or three if I try to hold them all while wrapping, so I use the latter method.
- Optional styling: Insert stem into a straw and push straw up close to the base of the flower. Bend the straw if you are using a flexible one since daffodils tend to look down at the ground. Glue the straw at the top and bottom to secure it to the wire. Now wrap the flower stem, including the straw, from top to bottom. You will probably need to wrap it twice to cover the color of the straw.


- Clip the end of the wire at the bottom to the desired length with wire cutters. I left 2 to 3 inches of wire below the straw so that I can insert that end into some foam for a easy daffodil centerpiece, which I will be demonstrating in my next post.
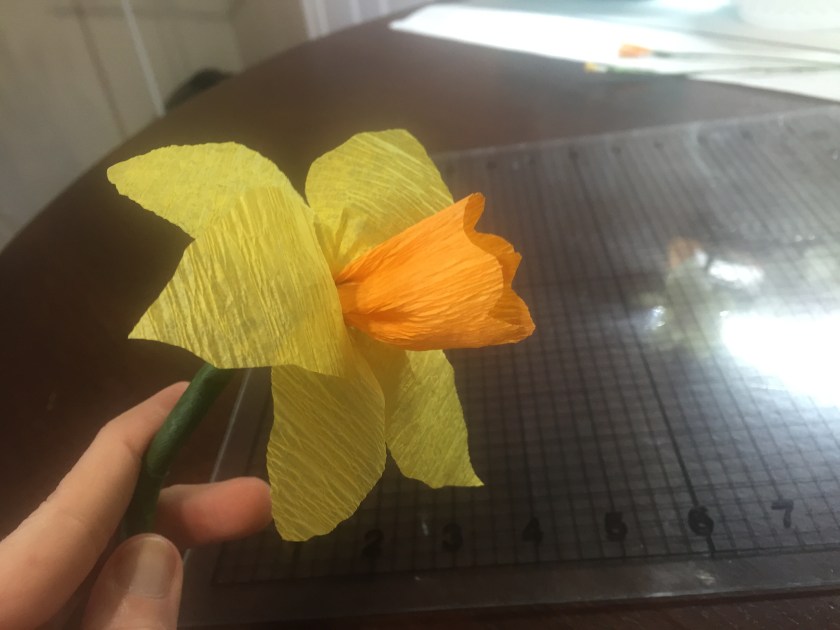
Now your flower is finished! If you completed this project, I’d like to see your work! Post a pic in my comments or email it KristyMichele@outlook.com.
Stay tuned for my next blog post on how to create a centerpiece using your paper daffodils. I have my container picked out and will be making about 6 or 7 daffodils for it. So start making your daffodils and select a short vase or bowl to showcase them! Until next time, paper artists…..this is KristyMichele signing out.

One thought on “Paper daffodils”