The Paper Florist


Well…..here it is paper crafters…..the reason I have been MIA for months…..my very first class to teach on Skillshare!  Hopefully this is the first of several I will make in a series called The Paper Florist. 

Check it out here: The Paper Florist: Paper Flowers for Everyone

My class is meant for the absolute beginner, and will teach you three different easy-to-make flowers.


It was huge learning curve, creating and editing my own video lessons but I’m so happy I tried it.  Please enroll in my free class!  If I get 25 students I will be featured on their home page and if you sign up for premium enrollment using my link, I can get paid from Skillshare.  

I hope you enjoy my class and learn a lot from it!  For now this is KristyMichele, the Paper Florist…..signing out.

Tulips for Mom


img_4554
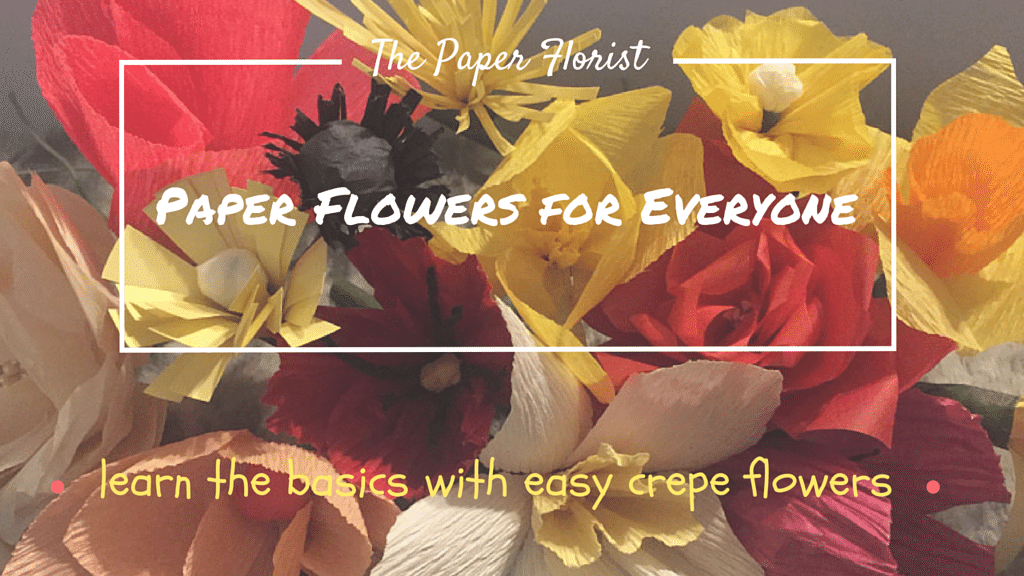
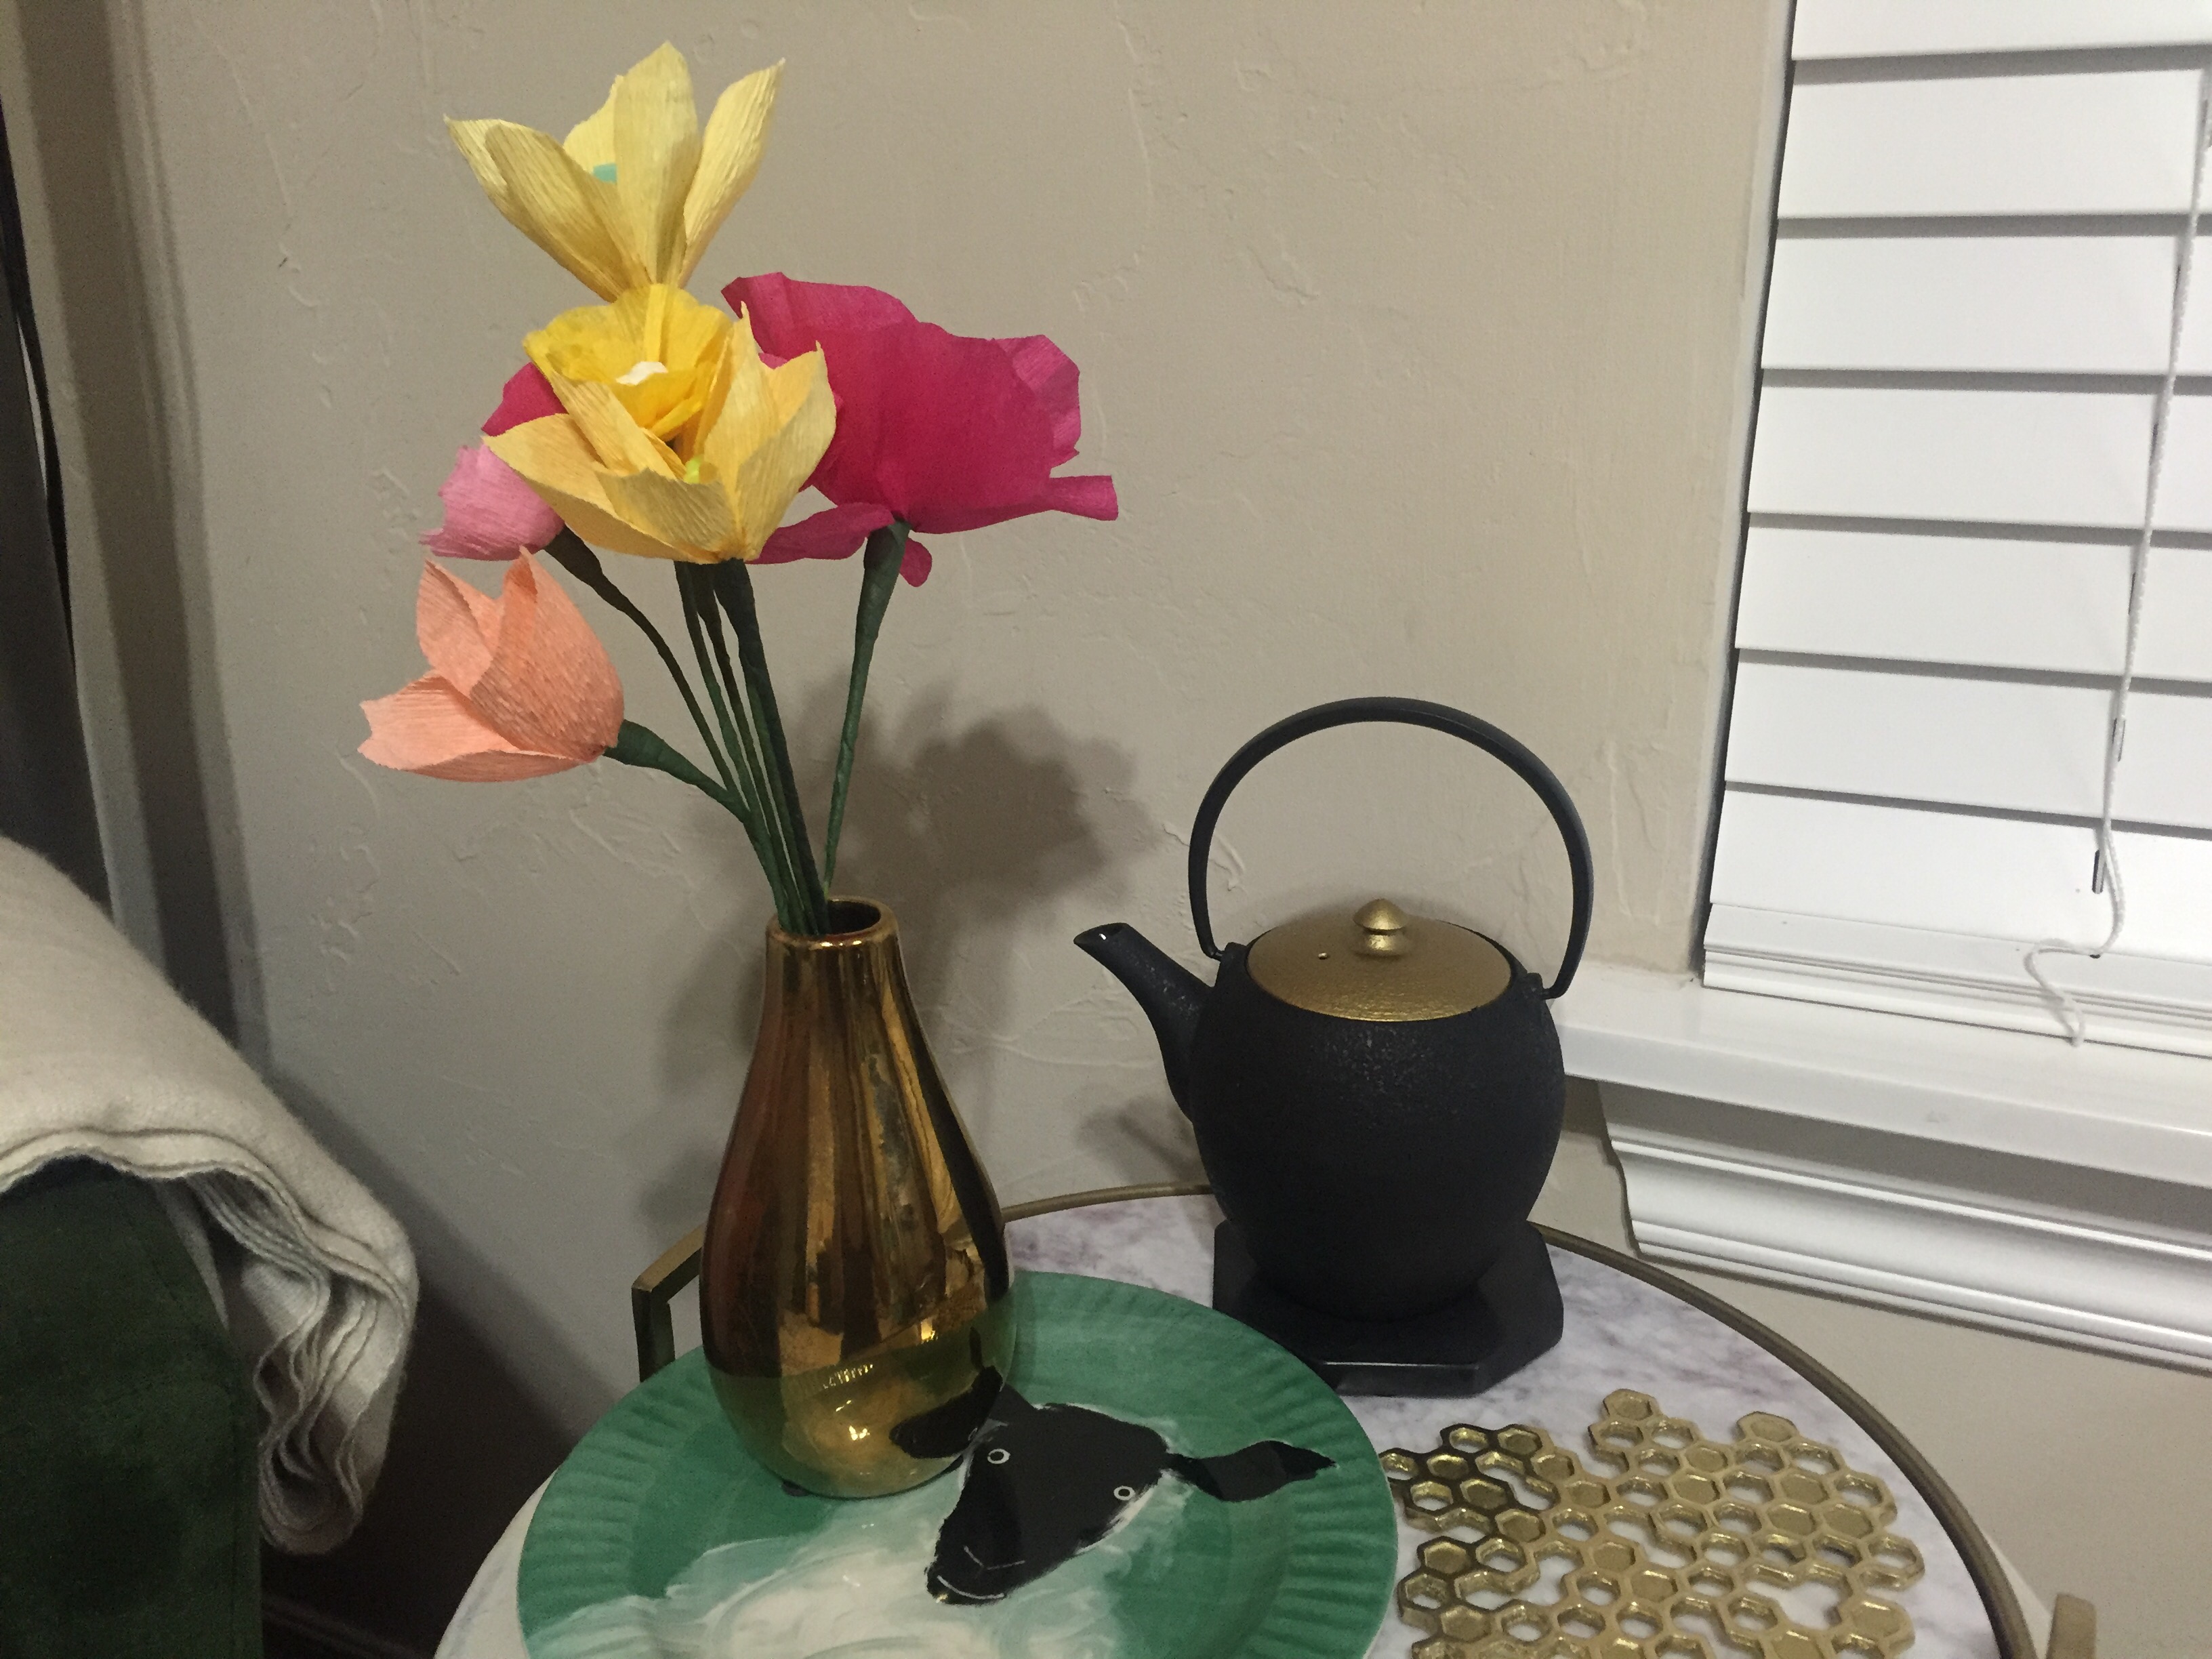
Mother’s Day is coming up fast and today I have for you a fast and easy way to dress up Mom’s card or gift.  I use these little guys as gift toppers, slipping them right underneath the tied ribbon.  Or make several and give Mom an everlasting bouquet to show her she is forever loved.  These paper flowers aren’t the most realistic looking ones in my arsenal, but what they lack in realism, they make up for in charm and durability.  The heavier paper means they won’t easily get wrinkled or ruined (unless you get them wet of course…..don’t water your paper flowers….they aren’t real).

Here we go with the supply list:img_4486

  • wire cutters
  • scissors
  • floral wire, preferably cloth wrapped
  • green floral tape
  • paper ribbon in black and either red, pink, white or yellow (also known as twisted paper).
  • yellow tissue paper
  • completely optional and only for the nitpicky like me:  a straw

Easier right?  No searching for heavy crepe, no online ordering (you can buy all these supplies at your local Hobby Lobby), no downloading templates, and best of all very little cutting.

Steps:

  1. img_4488
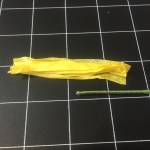
Ok well there is some cutting.  But it’s sooooo much faster than cutting individual petals.  Cut a 2 inch by 3 inch rectangle of your yellow tissue.  Cut a 2.5 inch section of black paper ribbon and three 3-inch sections of your brightly colored paper ribbon.  Use your wire cutters to cut a 6 inch section of wire (or longer if you are making several for a bouquet).
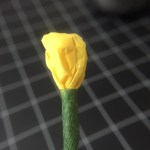
  2. Make the yellow center of your stamen.  Crinkle up your piece of yellow tissue and fold in half over the tip of your wire.  Tape in place with a small section of green floral tape, gently stretching the tape (to activate the adhesive) and wrapping it down the wire stem.
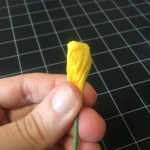
  3. Unfold your black paper, and cut in half with the grain.  Now make 5 to 6 cuts about 3/4 of the length of your paper.  Make sure and cut with the grain.  Twist each piece of fringe.  Cut a small to medium length of floral tape.  Wrap your black fringe around the yellow center and wrap your tape around the base of black fringe and down the stem to secure.
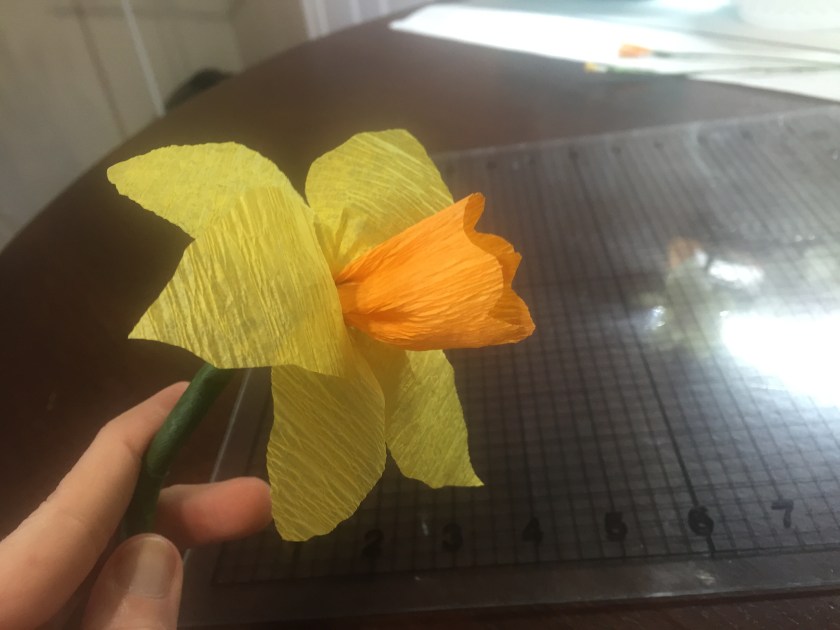
  4. Take your brightly colored pieces, unfold them, and round out the edges.  I like to round one side of each petal a little more than the other side for a more organic look.  I attach each petal separately for this flower because the petals are thicker and it just seems easier.  Cut 3 medium to large sections of tape (about 8 inches or so).  Attach each petal by scrunching the base of the petal just a bit, holding in place around the stamen with one hand, and wrapping tape around the base of the petal and down the stem to secure.  The petals will overlap each other some.
  5. With one last long piece of tape, wrap your stem one more time,slowly and carefully, for a finished look.
  6. Now for the overly ambitions ones out there, I like to make the stem a little thicker just like a real tulip by using a straw.  Insert the bottom of your stem into a straw and position the straw so that it butts up against the thick base of the flower.  Cut the bottom of your straw/wire to the desired length.  Now wrap tape from the base of the flower over the straw and down to the bottom of the straw.  If you cut a piece that is too short, no worries…..just cut another piece of tape and pick up right were you left off.  Twist the tape at the bottom and wrap it back up the straw just a bit to round the bottom out.  Where your tape ends, press in with your fingernail to keep it in place.
  7. Now shape your flower by gently stretching each petal  at the middle so that the petals cup around each other.  Straighten and shape the fringed stamen and viola!  Super cute and bright….strong enough to handle some handling….simple enough to make in 20 minutes or less……and a fun way to brighten Mom’s day!


Now run along and start creating!  Don’t make me tell you twice!  Happy Mother’s Day to all moms, mommies, mommas, mothers, and humoms.  You are, after all, the reason we are here to live, love and create.  Until next time, my flowered friends…..this is KristyMichele signing out.


Paper daffodils

image

How was your week fellow artists?  Did you sketch anything?  I’ve been hard at work trying different ways to make paper daffodils…making templates, an outline, photos, videos….more videos….and did I mention mistakes?  Well hopefully with today’s lesson, you’ll be making flowers, instead of mistakes.

First things first, your shopping list:

  • scissors
  • wire cuttersimage
  • floral wire, preferably fabric or paper wrapped wire stems, found at Hobby Lobby or Michaels in the floral section.  Mine is 18 gauge.
  • green floral tape, also at Hobby Lobby or Michaels
  • straws (optional, but will give you more realistic looking bulbs.  I tried both plastic straws with flexible tips and some thinner paper straws I found on clearance at Hobby Lobby.)
  • stamens, yellow or orange.  These can found at Hobby Lobby or Michaels in the cake decorating section.
  • cotton balls (also optional, but I like to wrap cotton around the base of the flower to make it wider)
  • crepe paper (a darker color for the inside petal and lighter color for the outside petals):  You can do white with orange center, white with yellow center, yellow with orange center, or all yellow.  I like the stiffness of a heavier crepe paper for the center petal and a thinner, more flexible crepe for the outside petals.  I order most of my crepe paper from Castle in the Air or Papermart.com.  For the outside petals, this time I went cheap and easy with streamer crepe from Hobby Lobby.  You can do the inside petal in this thinner crepe as well if you want a more delicate wispy look (or if you’re antsy and ready to start right away….instant gratification!)
  • if using straws to make the stem thicker, you’ll want a hot glue gun or craft glue to set in place.
  • a ruler to measure your crepe for cutting

Steps:

  1.  Print the petal templates I created just for this project (boy was this a huge learning curve for me….I definitely have a lot of digital know-how to learn):  Templates, daffodil [23402]  These are the outside petals.
  2. You will need 3 of each size cut from the thinner crepe.  I like to fold the crepe into three sections and cut each size petal all at once like so:
  3. Ok, so now for the center petal.  Cut a section from your stiffer crepe that is 3″ wide by 2″ deep.  As you can see by the larger orange crepe (above), you want your shorter side with the grain of the paper.
  4. The stamen will consist of 3 to 4 yellow or orange cake decorating stamens.  Or you can make your own stamen with a 1″ wide by 1.5 ” piece of crepe, cut with the grain on the long side and fringed with scissors.  To fringe, simply make several cuts down the length of the crepe (with the grain) about 3/4 of the way down, like so:
  5. Now cut ‘waves’ on one long side your center petal crepe (as demonstrated in the third photo above).
  6. Now lay out all your petals, stamens, a wire stem, and several cut sections of floral tape.  These are what you will use to wrap each part of the flower to the wire stem.  It is best to cut them ahead of time before you forget….and then all of a sudden you have a handful of petals perfectly placed and no tape….no this has never once happened to me…this is all hypothetical of course ;).
  7. Now limber up those fingers because this is where the fun really begins!  You will first be attaching the stamen.  If you fringed your own stamen, crinkle the base of the crepe as you wrap it around the stem.  If you bought cake decorating stamens, simply fold them in half, so the round tips are all together and hold tight against the end of the wire stem.  To attach the stamen, press one end of a smaller section of tape to the base of the stamen and wrap the tape around and down the length of the wire stem, stretching slightly as you go to activate the adhesive.  For those of you visual learners, the video below demonstrates wire wrapping technique as well as most of the flower steps.
  8. The cotton ball step is optional but if you want a wider flower base, pull off a small section of a cotton ball and wrap around the base of the flower.  Secure it with tape.
  9. Now, grab your center petal piece and stretch each round to give a flutterly feel to the petal.  Crinkle the straight base as you circle it once around the stem, overlapping just a little at the end.  Secure by wrapping with tape.  Shape the base of the petal by stretching it slightly all the way around to make it look more round rather than crinkled.
  10. Now, let’s move on the outside petals.  First stretch the middle of each petal gently so that it bends slightly backwards.  Scrunch the base of each petal.  Now attach each petal so that they bend away from the center petal with floral tape, alternating the 2 styles.  You can place each petal where you want them and hold them all tightly while wrapping or you can cut a really long piece of tape and attach each petal individually while wrapping.  I almost always drop a petal or three if I try to hold them all while wrapping, so I use the latter method.
  11. Optional styling:  Insert stem into a straw and push straw up close to the base of the flower.  Bend the straw if you are using a flexible one since daffodils tend to look down at the ground.  Glue the straw at the top and bottom to secure it to the wire.  Now wrap the flower stem, including the straw, from top to bottom.  You will probably need to wrap it twice to cover the color of the straw.
  12. Clip the end of the wire at the bottom to the desired length with wire cutters.  I left 2 to 3 inches of wire below the straw so that I can insert that end into some foam for a easy daffodil centerpiece, which I will be demonstrating in my next post.

image

Now your flower is finished!  If you completed this project, I’d like to see your work!  Post a pic in my comments or email it KristyMichele@outlook.com.

Stay tuned for my next blog post on how to create a centerpiece using your paper daffodils.  I have my container picked out and will be making about 6 or 7 daffodils for it.  So start making your daffodils and select a short vase or bowl to showcase them!  Until next time, paper artists…..this is KristyMichele signing out.