Well it’s amateur hour! Don’t get excited…I’m talking about my video editing skills, not your sketching…silly. I don’t have exactly the right equipment and believe it or not, it’s incredibly difficult to video my work with my phone in my left hand while sketching with my right. That being said, if you’ll bear with the rudimentary photos/video footage and hopefully-not-too-vague instructions, you can learn my process and create a sketch of your own…..perhaps the first sketch of a well-loved sketchbook.
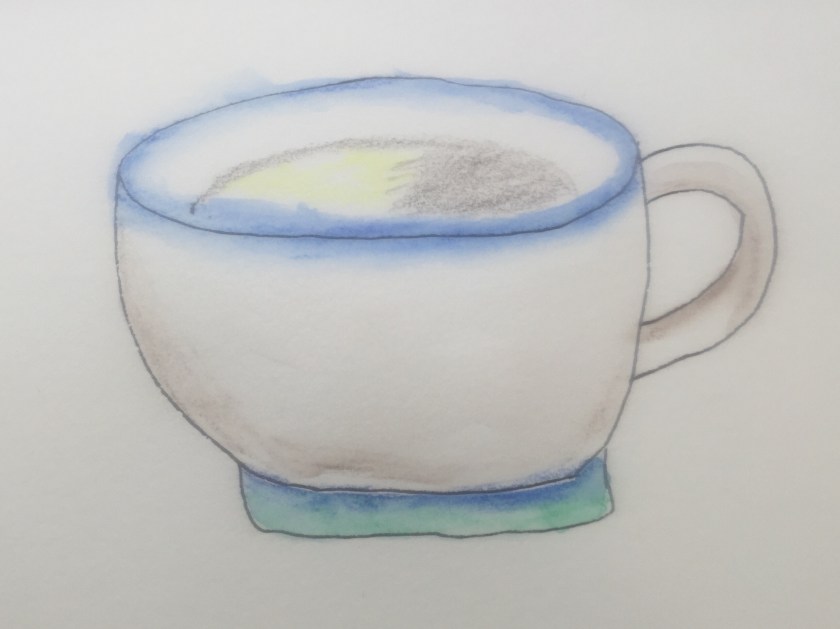
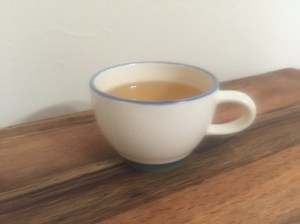
I selected one of my favorite things to sketch, a teacup. This one is fairly simple in shape and detail and a good confidence booster if it’s your first watercolor sk etch. For this exercise you will need a cheap watercolor or craft brush (something soft, not bristly), a small set of watercolor pencils, a permanent pen, and of course paper or a sketchbook thick enough to handle some water. I am using my Faber-Castell Pitt Artist Pen size S (but a Bic or a Sharpie pen works just fine), a watercolor pencil set from Faber-Castell, a cheap watercolor brush that came in a set of 5 at Hobby Lobby, and my Strathmore 500 Series Mixed Media Journal.
First I look closely at my subject. What colors are represented? I only used blue, green, yellow and brown in my sketch. Where are the shadows and highlights? You can squint your eyes to blur your focus and see these better. I won’t get into too much detail on shading yet. This exercise is really just meant to get you loosened up and having fun.
Step 1: Draw the outline of your subject. Don’t worry about scale or proportion. Just draw what you see. My teacup drawing isn’t perfectly round either, and that’s okay. It’s just a sketchbook after all. 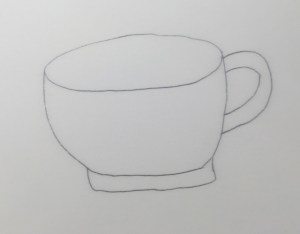
Step 2: I color in the blue and green parts of the tea cup with watercolor pencil. The photo does not show it well, but the bottom of the cup has blue merging with green. I notice that there is a shadow on the left side of the cup and the inside of the handle where it curves in. I use brown to represent these shadows like so: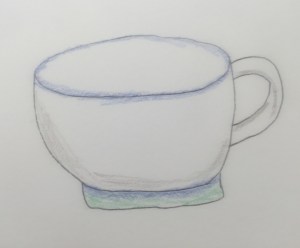
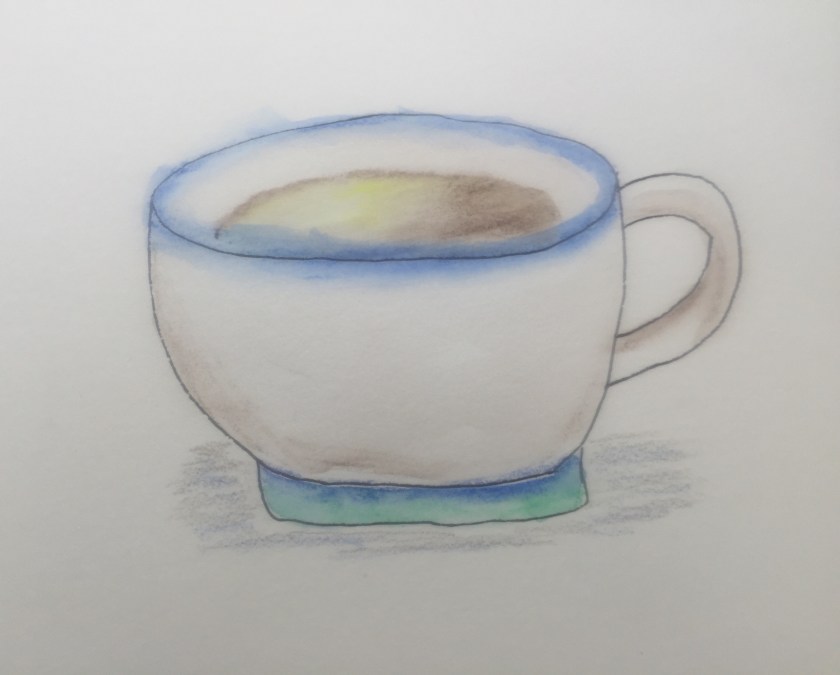
Step 3: I decide to go ahead and finish the outside of the cup by adding some water with my brush. Dip your brush in the water and blot a little with a paper towel so that you don’t drown your paper. I first deepen the color of the blue and green parts with water and let that dry just a few seconds before moving to the brown. To finish the outside of the teacup, I start my brush on the side with the brown shading and drag it across the cup. This way, it gets lighter and lighter as you go to the right, creating the illusion of the roundness of the cup. Leave the lightest parts alone of the cup alone. This part is probably best shown by the video below.
Step 4: Now, let’s move to the inside of the cup and the tea itself. The shadows on the inside of the cup are to the right so I add brown on the right inside rim. For the tea I use yellow on the left (highlight) side and brown on the right (shadow side). I blend the two colors of the tea with water using my brush.
Step 5: The shadow the cup casts on my desk looks like it’s falling behind the cup. I draw a thin line of shading underneath the cup and a larger block of color up each side. For the shadow I use brown and a little blue layered on top. Then add water and sort of muss it all up and you’re done!
Bonus: I like to add a sentence or two in whimsical lettering about the sketch….where I am, what I’m doing at the time, how I’m feeling….whatever feels appropriate to say. Date, sign your name, or frame an outline in pen if you want.
Now admire your work, let it dry, and move on to a fresh page. You did it and hopefully had fun in the process! I definitely did! Cya next week, artists. Until later, this is KristyMichele….signing out.

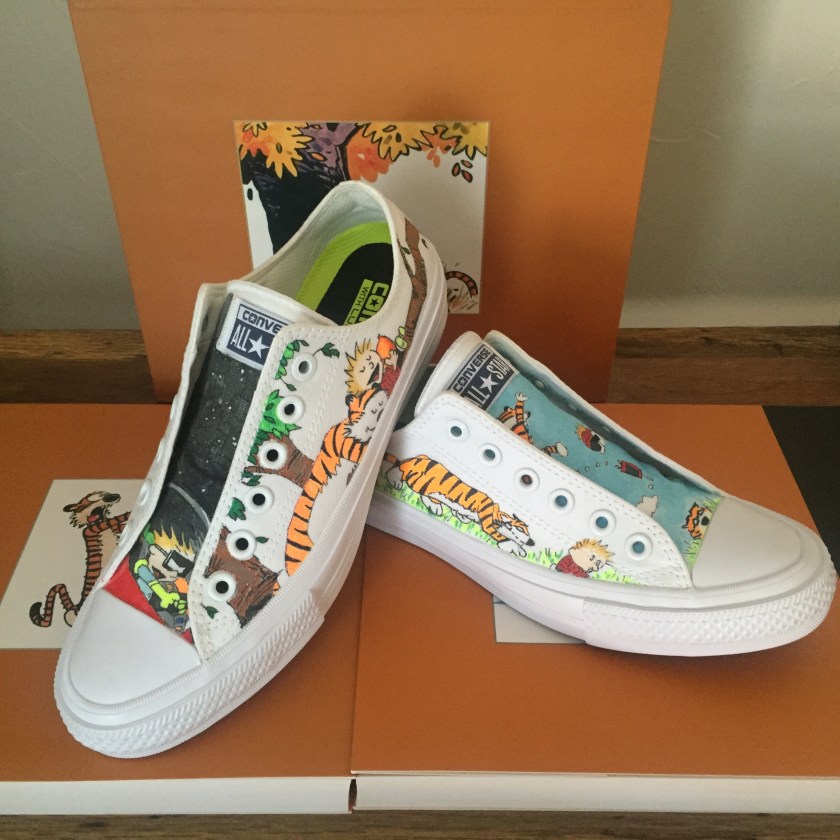

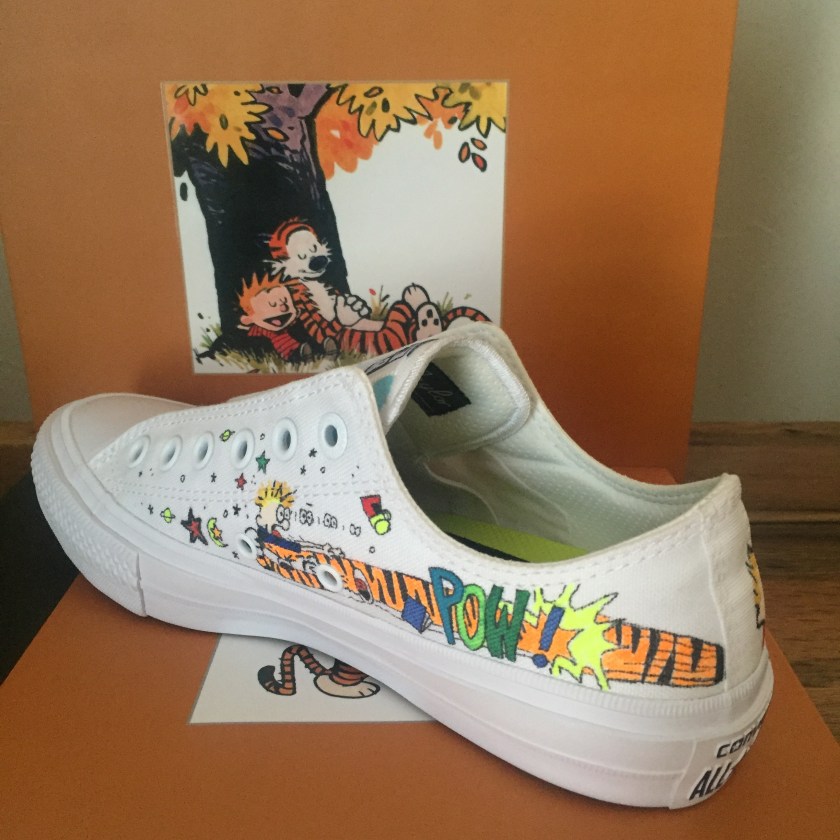
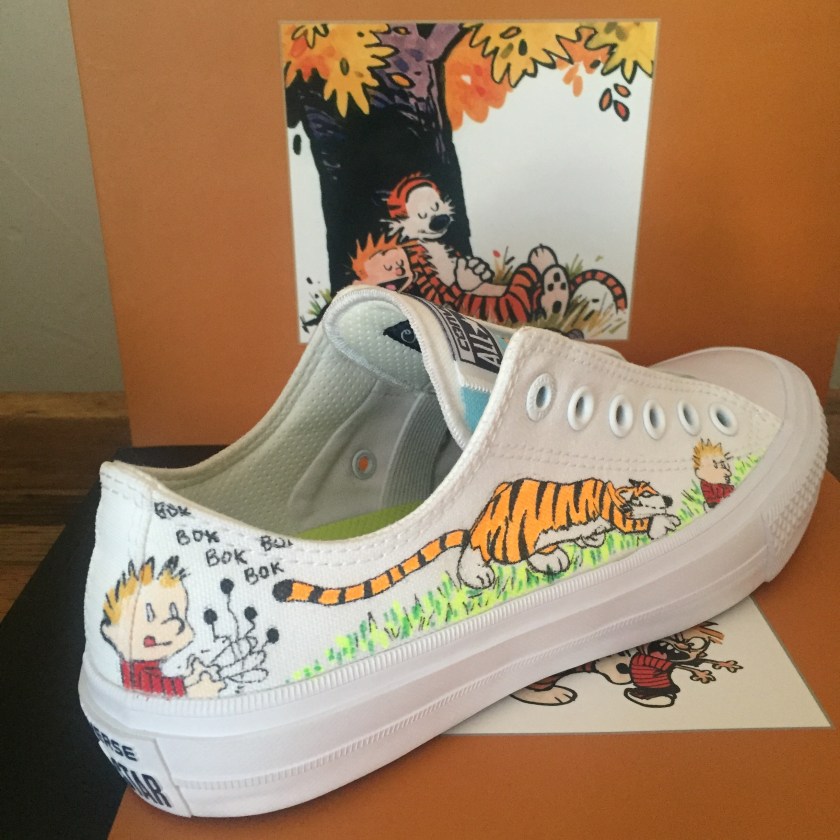
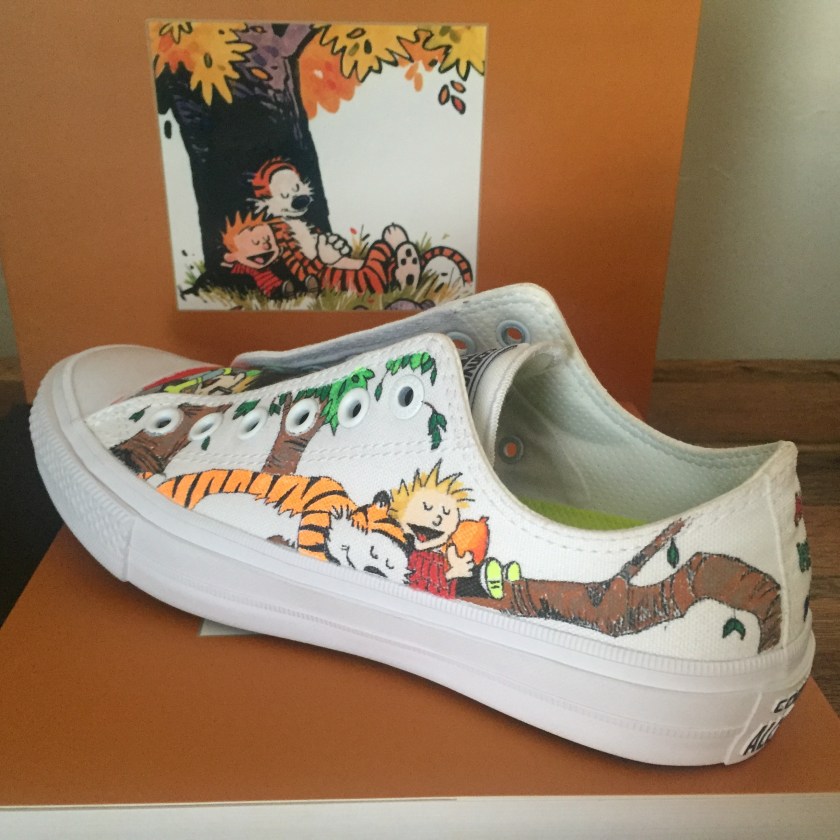
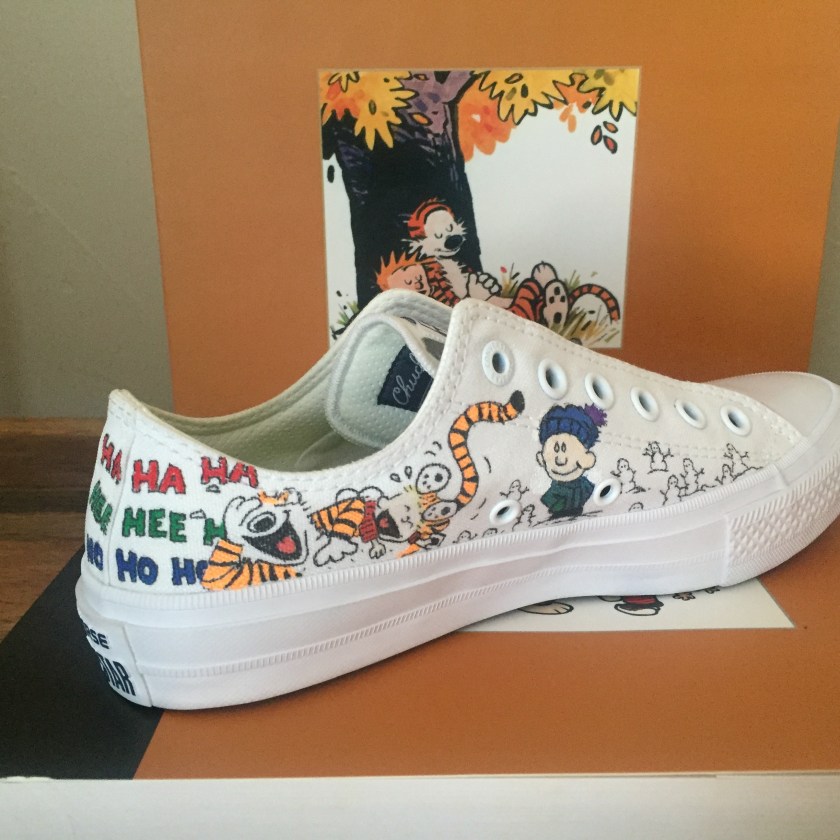
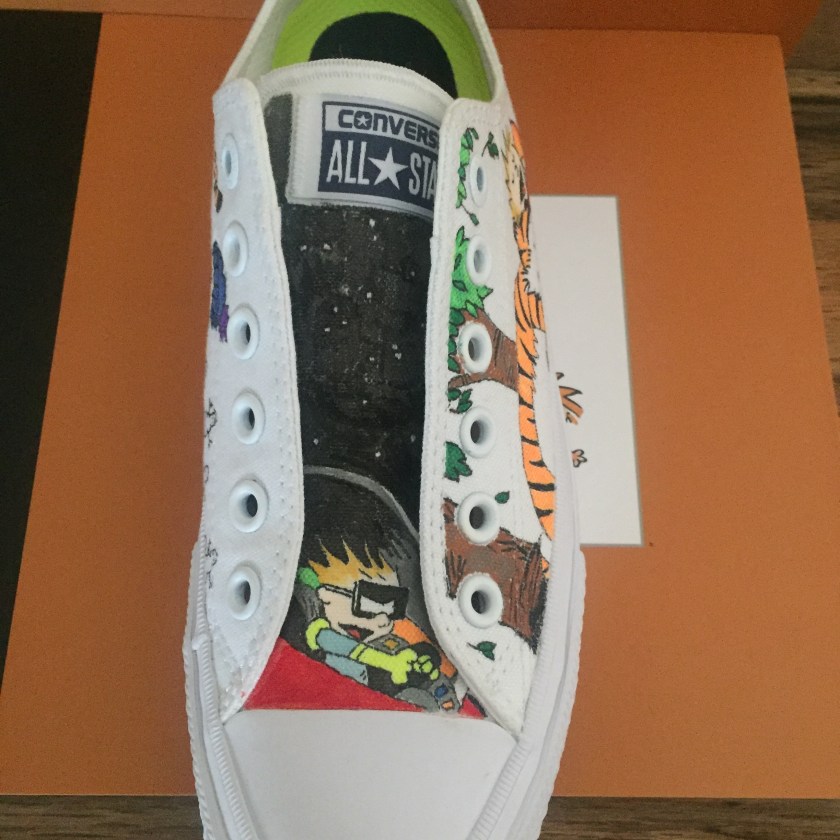
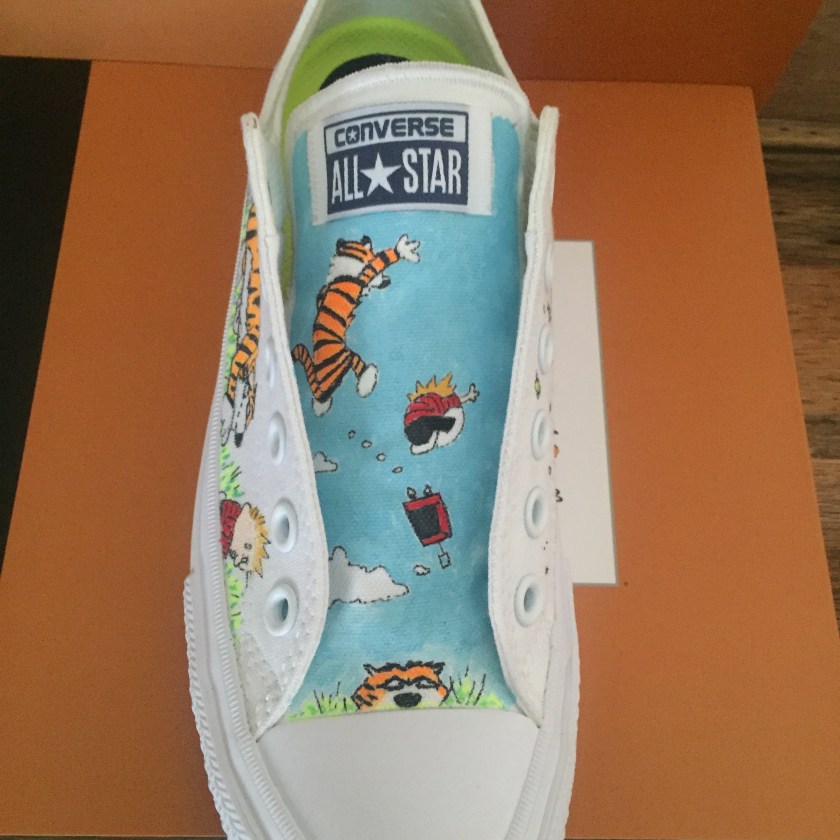 I used fabric paint, fabric markers and paint markers for the design. Then I sealed the paint with some clear matte varnish. The markers were definitely the easiest to use, but I don’t think they would show up as well on shoes that aren’t white. I’d like to try my hand at a different color next time so I will definitely be practicing up on my fabric paint skills. The most difficult part of this project was finding designs that would fit on the quite narrow sides of these shoes.
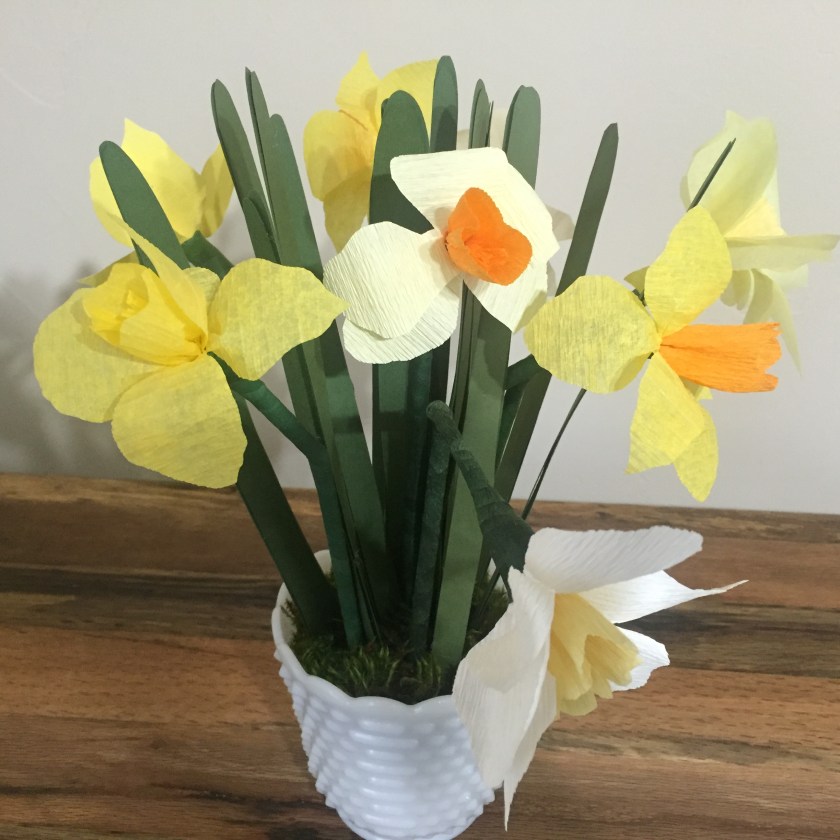
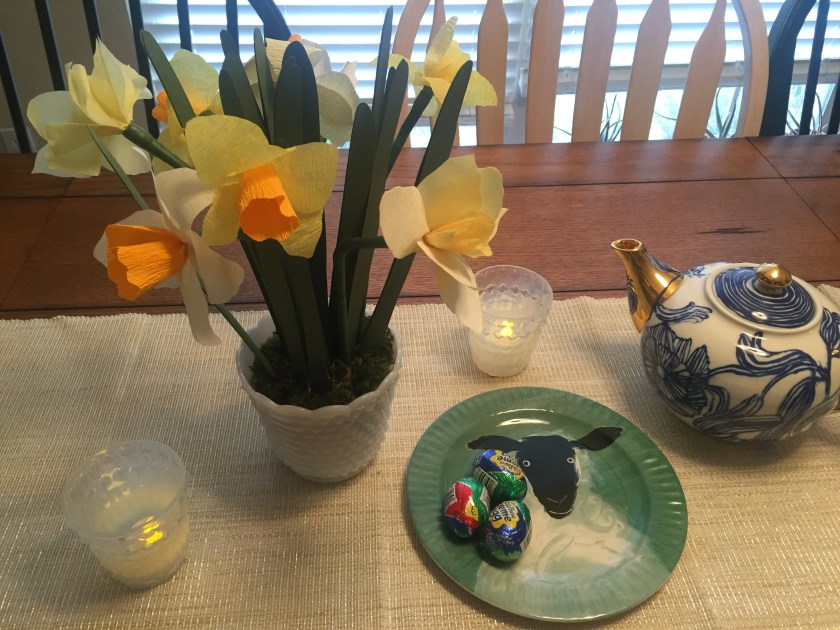
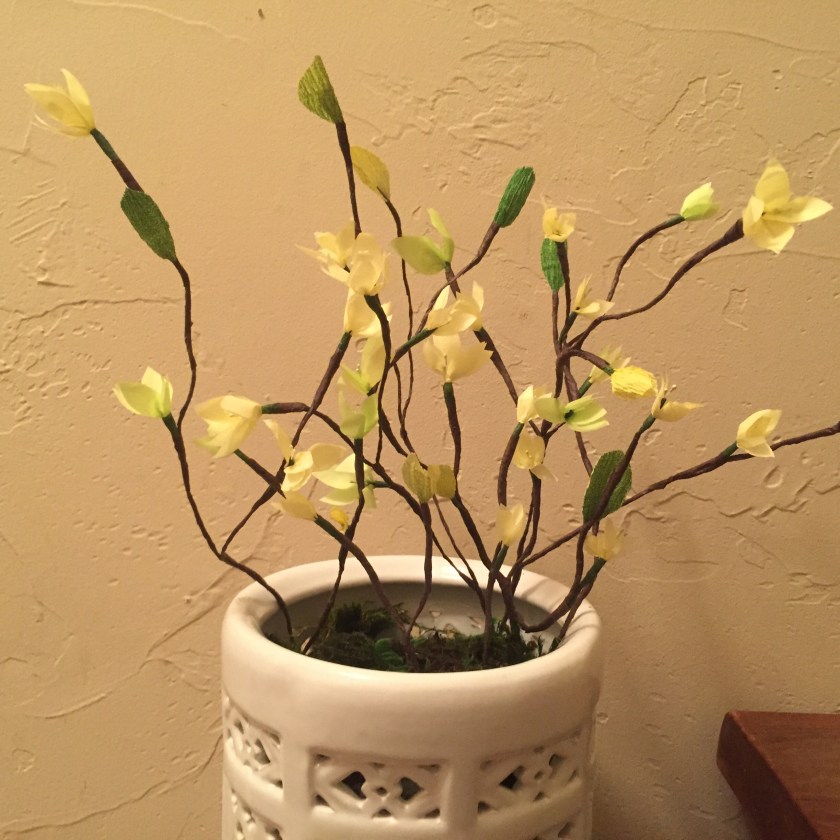
 Mother’s Day is coming up fast and today I have for you a fast and easy way to dress up Mom’s card or gift. I use these little guys as gift toppers, slipping them right underneath the tied ribbon. Or make several and give Mom an everlasting bouquet to show her she is forever loved. These paper flowers aren’t the most realistic looking ones in my arsenal, but what they lack in realism, they make up for in charm and durability. The heavier paper means they won’t easily get wrinkled or ruined (unless you get them wet of course…..don’t water your paper flowers….they aren’t real).
 Ok well there is some cutting. But it’s sooooo much faster than cutting individual petals. Cut a 2 inch by 3 inch rectangle of your yellow tissue. Cut a 2.5 inch section of black paper ribbon and three 3-inch sections of your brightly colored paper ribbon. Use your wire cutters to cut a 6 inch section of wire (or longer if you are making several for a bouquet).
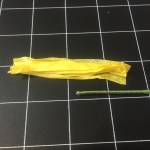
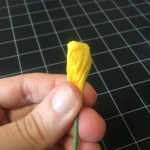
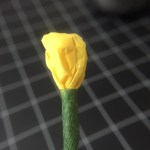


 Now position 4 petals around the pip center and attach with another section of green floral tape. You don’t have to cover the entire section of wire with green tape because we will attach these to your branch with brown tape later. If you need help with your flower-making and wire wrapping technique, watch my YouTube video on my previous flower post,

 This first and only (that I know of) sketch crawl OKC went down Saturday afternoon. First off, for those of you who have never heard of a sketch crawl…..it is a gathering of sketchers who meet in a specific time and place to sketch their surroundings together. If you are intimidated to sketch in public, I highly recommend trying one. I found that having other people around doing the same thing alleviated some anxiety I had about urban sketching. This particular one was hosted by the
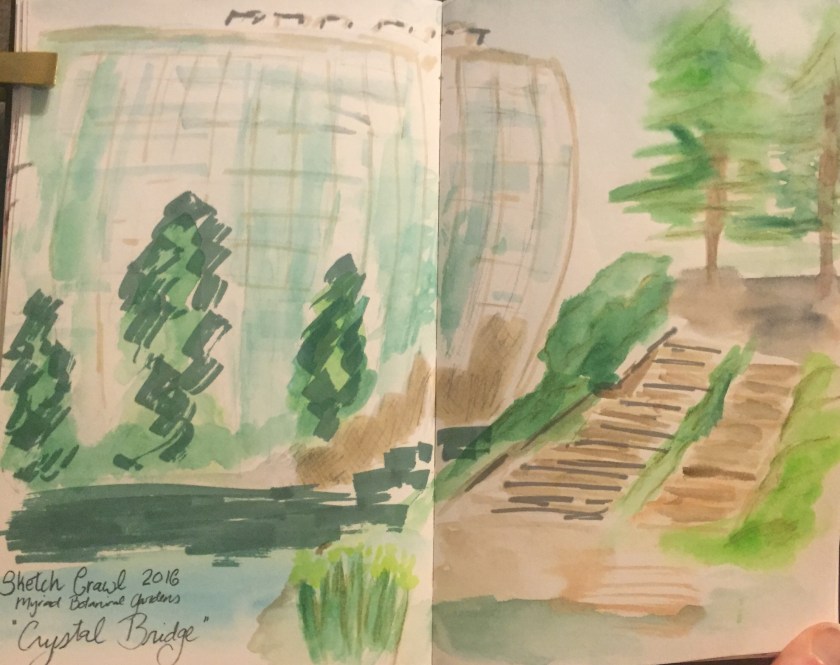
 Don’t bring all your favorite sketching supplies….just your favorite essentials. You will feel weighted down and disorganized very quickly. I brought all my favorite supplies, but I wish I had brought just one pencil, one pen, 2-3 paper towels, my watercolor kit, waterbrush, and small container of water.